
Graphic designing and designing for laser cutters are two different things even though the same (or similar) tools are used for both. Corel Draw, Adobe Illustrator and Inkscape are most commonly used in the business, but there is plenty of free and paid vector drawing software (you can check out community recommended design software here).
Whether you are planning to cut your projects by yourself, or you are planning to send your files to a specialized laser cutting business so they can do it for you, there are some general rules you need to follow when creating laser cutting design.
Use vector drawing software
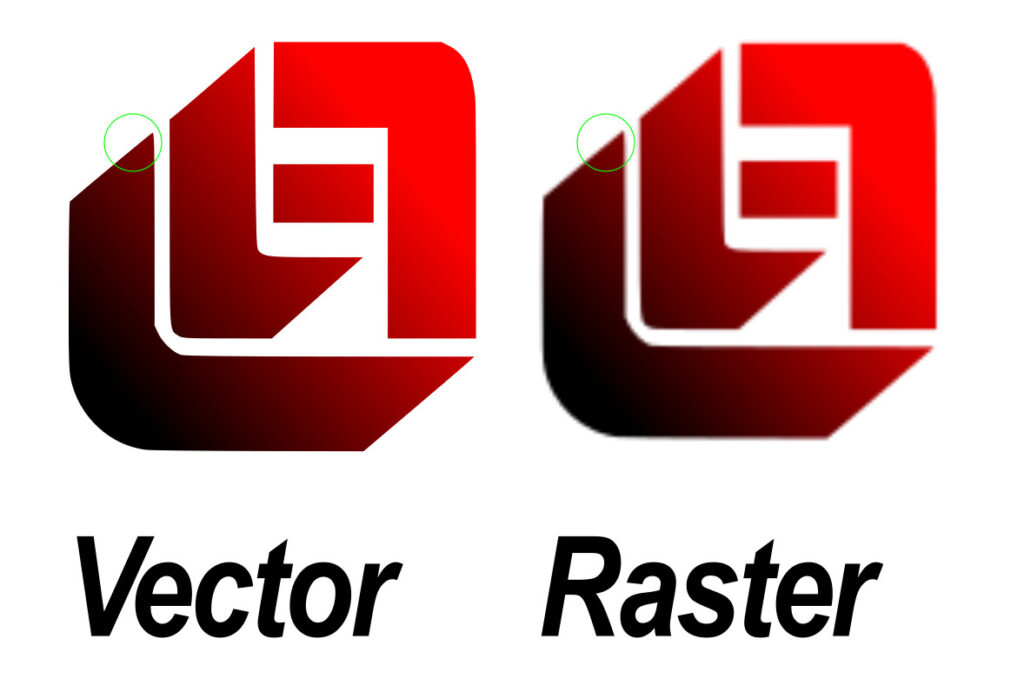
This one might be obvious to some people, but it needs to be said nevertheless. Raster based software (like Photoshop or Gimp) are based on pixels and are not suited for designing projects for laser cutter. Vector based software on the other hand are based on paths and lines (vectors) and are intended for creating vector graphics and logos. Use these instead. You can read more about differences between vector and raster types of graphics in a separate article here.
Scale your projects to size (1:1)
Another one that might be obvious, but sometimes it isn’t, so here it is.
When creating a laser cutting design, try to use real life units like inches or millimeters instead of pixels, points or percentages. If you are not sure about how big or small will it be, try printing it at 100% scale to get a better understanding.
Use appropriate colors for layers
Laser cutters can only perform 3 types of operations:

- Raster engraving or scanning (same type of process used by inkjet printers, file is “printed” line by line but it removes pieces of material instead of applying ink)
- Vector engraving or scoring (same as vector cutting but at higher speed and with less power so it doesn’t go deep into the material)
- Vector cutting (cutting along the lines)
It is important to create laser cutting design with this in mind and assign appropriate color for the specific operation you want to perform on that part of the design. Laser controlling software allows you to configure one of 3 operations and assign power and speed for each color (layer) of the line in your design.
Most laser controlling software use red color for vector cutting and black or blue for vector engraving as a default.
Use stencil fonts for letter cutouts (or create “bridges” manually)
If all you want to do is engrave some text, any font you pick is going to work, but if you want to cut letters then you will run into a problem with letters that have “islands” or closed internal paths (like B, D, O etc.). If you try to cut these letters the insides of the letters fall out.
To cutout letters use stencil fonts, which are designed for this purpose and have the inside parts connected to the outside so that they don’t fall out, or you can manually create bridges that will connect inside parts of the letters with the outside.

Notice how in the second example the “islands” on the letters ‘a’ and ‘e’ will fall out because those inside pieces are isolated and not connected to anything. Stencil fonts fix this issues.
Convert fonts to shapes
Another problem with fonts you can run into is not being able to import them properly. Depending on the laser control software and designing software you use you might run into problems with importing fonts with your designs. Most laser controlling software usually don’t have all the different text option that design software do, so your imported text will either look different or not import at all. Lightburn, for example, does support importing of fonts from Inkscape, but any modifications to font made in inkscape (such as letter spacing or horisontal and vertical kerning) will not be show in Lightburn, so be warry of that.
To solve this problem you need to convert all text objects into paths (curves) before you try to import it into you laser controlling software. All design software will have this option, but depending on what you use it might be called something slightly different.
In Inkscape its called Object to Path (select text, go to Main menu | Path | Object to Path).
In Adobe Ilustrator its called Create Outlines (select text, go to Main menu | Type | Create outlines).
In CorelDraw its called Convert to Curves (select text, Main menu | Arrange | Convert to curves).
Check your design in “outline” mode
Laser cutter machine is quite literal, it will try to cut every line that exists on your laser cutting design so don’t add anything you don’t want to have your laser cut (like dimensions for example).
Duplicate and overlapping lines can be a problem for your laser because even though you cannot see the lines your laser can and it will cut the same line twice if you don’t remove it in the design process. Some laser controlling software are smart enough to recognize this problem and give you an option to remove overlapping lines, but it is better to be safe and solve this in the design process.
Also, try to close open paths whenever possible especially on the parts that are intended for engraving, or you might end up with some unexpected results. Different laser software treats open paths differently, so you might get by with it, but in general it is better to avoid open shapes when possible.
One thing that no laser controlling software accounts for is thickness of the line (or stroke) because the thickness of the line is always the same and it is conditioned by the width of a laser beam at the focal point. So you will need to adjust your design if you want to have different line thickness in the produced piece.
A good practice for is to always check your design in “outline” or “wireframe” view before you send it to the laser. That way you will spot any possible issues before you start your laser job so you don’t get any surprises when your laser cutter starts cutting where you didn’t expect it would.

Account for kerf if you design for assembly
If you are designing boxes, models or some other object that needs to be assembled you will need to take laser kerf into the account, otherwise the fit between parts will be loose and your object will require gluing.
Kerf is the part of the material that laser cutter “burns away”. Width of the kerf depends on the material you want to use and varies from one laser to the other but for most of CO2 lasers is between 0.1-0.3 mm. Some laser control software offer an option to account for this and adjust designs based on the provided value.
Alternative to this is to create nodes like in the picture below.

File types
Different laser controlling software allows import of different file formats. Also different designing programs have different native file type they use to save drawings in. Most of them have an option to save in a different file format, so any design software u use will be able to create and save files in a format that will be readable by you laser controlling software. You can read more about different types file formats for laser cutters here, but in a nutshell, some of the most commonly used file formats in the laser cutting industry are:
- .svg (Scalable Vector Graphics) – XML based vector image format that Inkscape uses natively, but lots of other software’s can open them (even your browser). It is supported by almost all of laser controlling software’s out there. Since its usually small in size (and fully editable and scriptable),it extensively used in web development which Is why most browser based laser cutter file generating tools use this file format.
- .pdf (Portable Document Format) – usually used for text documents but can contain vector graphic as well. As with .svg almost all laser software (and browsers) can open a.pdf file.
- .ai (Adobe Illustrator artwork) – proprietary file format created with Adobe Illustrator. Can be imported by most laser controlling software.
- .dxf (Drawing Exchange Format) – CAD data file format develop by Autodesk and typically used with AutoCAD. Most laser software’s will import this file type, but depending on which one you use, the results may vary…
- .cdr – vector graphics file used as a main file type for CorelDraw. Many laser software solutions do not offer support for direct import of this file type there are macros available that will allow to send your designs directly from CorelDraw to laser software.
There are few others like options like .eps, .dwg, .plt or .hpgl these are not used as much in laser cutting design as the ones mentioned above.


